Inspired LED flexible strips are a versatile option for any indoor accent or task-lighting application. Low profile, and (of course) low-voltage, these handy little strips are the perfect way to add a little extra light wherever you need it most.
To make installation as simple as possible, we offer our customers the convenience of both pre-soldered “plug & play” connectors or simple solderless connectors for DIY field work. However, we recognize that there are certain circumstances where desire or necessity may require some good, old-fashioned soldering. When this is the case, we recommend the following techniques for soldering cables and connectors to Inspired LED flexible strips.
Before you begin, please read these important soldering safety tips:
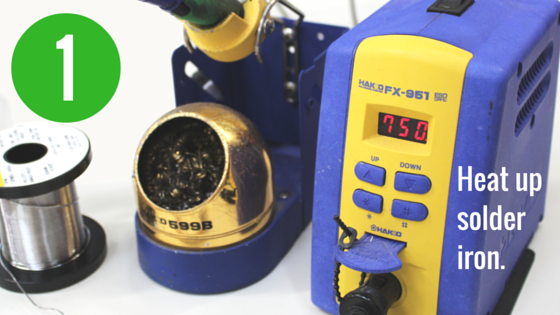
- Be careful, soldering irons get extremely hot! (Our technicians recommend a temperature of 700° F.)
- Be sure to work in a well ventilated area to avoid breathing fumes.
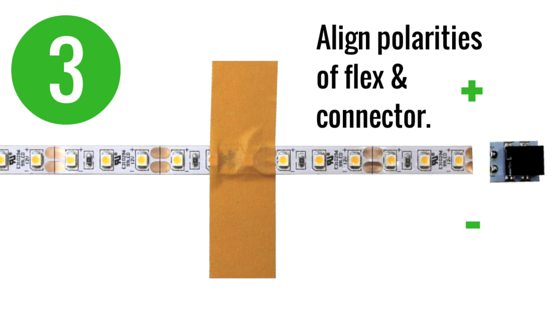
- Pay attention to polarity. Mismatched positive and negative polarities will result in the LED strip not functioning properly.
- Don’t rush, but work quickly once flux is applied to ensure it does not dry out.
- Clean off the tip of your soldering iron by brushing against sponge between uses.
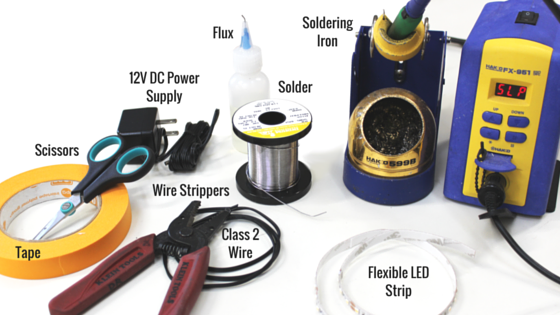
To add soldered-on connectors, you will need: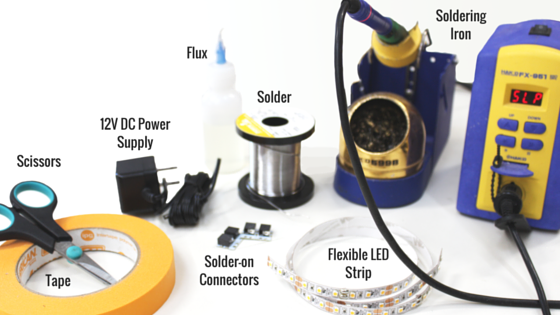
- Soldering iron
- Spool of solder
- Flux paste
- Flexible LED Strip
- Scotch or painter’s tape
- Scissors
- 12V DC power supply with 3.5 x 1.3mm plug
- Inspired LED solder-on connectors (one per connection point, available for purchase over the phone)
- Wire sponge or damp kitchen sponge
1. Begin by turning on your soldering iron and allowing it to heat up to about 700°F.
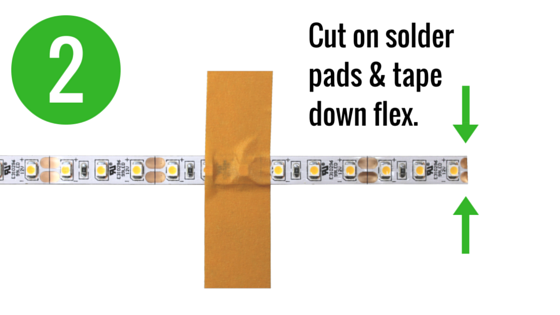
2. Ensure that the flexible LED strip has been cut to expose copper solder pads, these will be your connection points. Use tape to secure the LED strip in place at your work station.
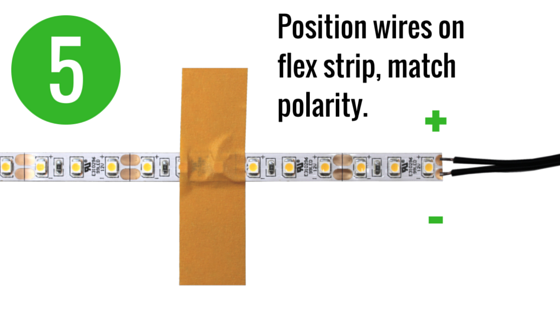
3. Align your solder-on connector with the copper solder pads at the end of your flex strip, ensuring that your polarities are matched positive to positive, and negative to negative.
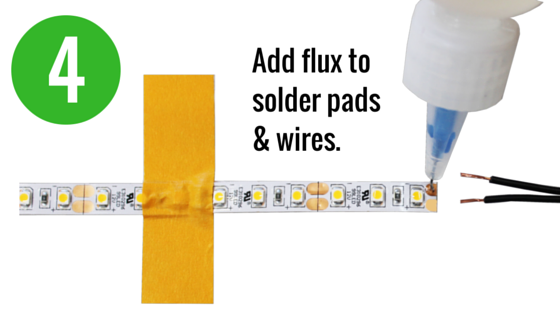
4. Add a drop of flux to each solder pad on the end of the flex strip, and a drop to each of the silver solder points on the end connector. This will improve the flow of solder, leaving a smooth solder joint.

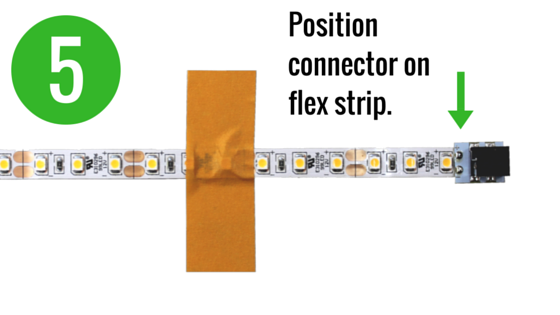
5. Position connector on solder pads of flex strip for mounting.
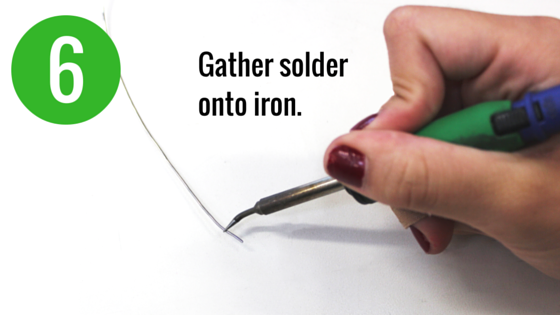
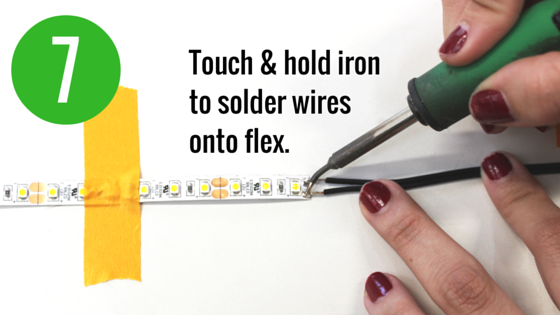
6. Use tip of heated soldering iron to collect a bead of melted solder.
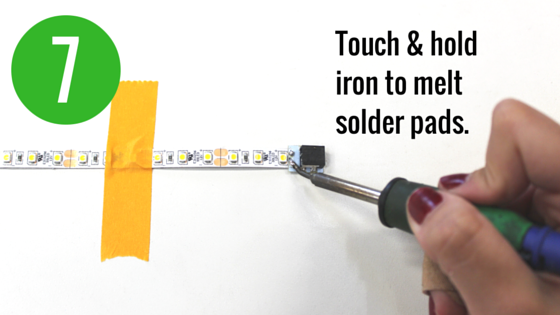
7. Touch melted solder to each silver pad on your end connector, holding for 1-3 seconds, (no longer or solder will begin to brown & burn).
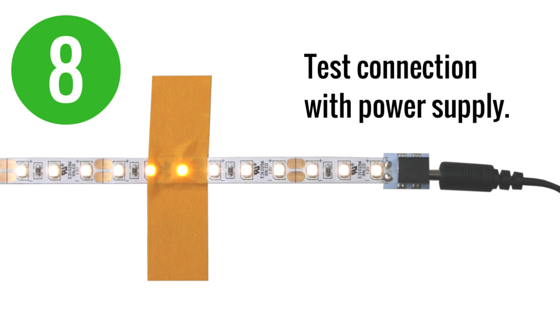
8. Use a standard 12V DC power supply to plug into end connector and test functionality. If solder has made a proper connection lights will turn on.
To add a soldered-on cable lead, you will need:
- Soldering iron
- Spool of solder
- Flux paste
- Flexible LED strip
- Scotch or painter’s tape
- Scissors
- 12V DC power supply
- Inspired LED cable or 18-22 AWG wire
- Wire strippers
- Wire sponge or damp kitchen sponge
1. Begin by turning on your soldering iron and allowing it to heat up to about 700°F.
2. Ensure that the flexible LED strip has been cut to expose copper solder pads, these will be your connection points. Use tape to secure the LED strip in place at your work station.
3. Strip back your selected cable about ¼ inch. Identify the polarity of each side of cable, (if using Inspired LED interconnect cable, white lettering indicates positive polarity).

4. Add a drop of flux to each solder pad on the end of the flex strip, and to the exposed ends of your cable. This will improve solder flow, leaving a smooth solder joint.
5. Match the positive and negative sides of cable to flex strip, position on solder pads for mounting.
6. Use tip of heated soldering iron to collect a bead of melted solder.
7. Touch melted solder to each cable lead, covering the exposed wire with solder, holding 1-3 seconds (no longer, or solder will begin to brown & burn).
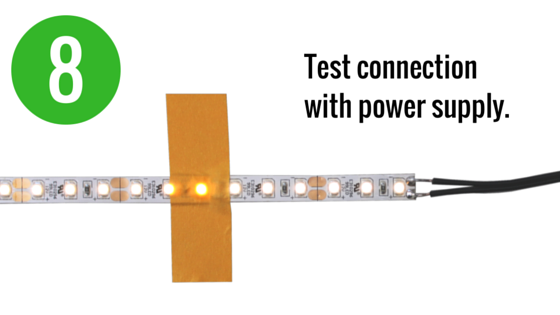
8. Connect your newly soldered cable to a standard 12V DC power supply to test functionality. If solder has made a proper connection lights will turn on.
With just a bit of soldering practice, there is no limit to the types of LED systems you can create in the field, or the comfort of your own home. For more handy tutorials from Inspired LED, visit our resources page at www.inspiredled.com/resources. If you have questions regarding our LED products, contact us at orders@inspiredled.com, or call us at 480-941-4286.