 Using one of Inspired LED’s many popular plug & play kits, it is easier than ever to add a bit of low-voltage lighting just about anywhere. But often, when dealing with a high-end application, such as a new business or home remodel, customers prefer to have the sleek, seamless control of a standard wall switch or dimmer.
This is where the benefits of a hardwired dimmable transformer come into play. While a switched outlet will allow your LED lights to be turned on and off using a standard plug-in system, or dimmed using an in-line switch, it is the hardwire transformer which allows these low-voltage lights to be dimmed using a conventional wall dimmer.
The transformer is responsible for taking the 120V AC running through your existing wiring, and stepping it down to a more LED friendly 12V DC. By combining this component with a compatible wall switch, and a few other basic tools, your LED system can be easily integrated into your home or business in just a few simple steps…
Before continuing, please note:
Hardwired transformers are to be installed in accordance with Article 450 of the National Electric Code by a qualified electrician only. Transformers should always be mounted in a well-ventilated, accessible area such as an attic or cabinet, never cover or seal transformers inside a wall. This tutorial is meant to act as a simple guide for professionals, it is not intended for DIY, nor is it a substitute for hiring an electrician.
To install, you will need:
- Inspired LED hardwire dimmable transformer (E-series or Magnetic)
- Compatible wall dimmer switch (see our list here)
- In-wall rated or armored cable (18 – 22 AWG, 2-conductor, Class 2+)
- Inspired LED standard interconnect cable (optional)
- Junction box(es) (optional as needed)
- Wire nuts
- Cable strippers
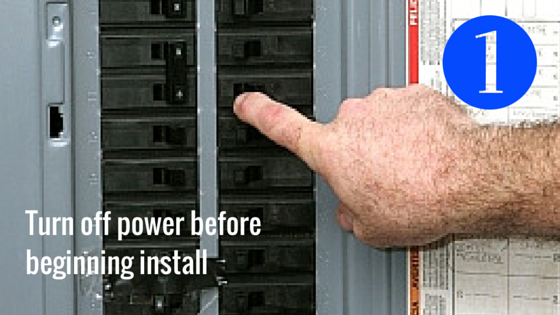
- Turn off power to the location where the transformer is being installed, be sure your LEDs and the compatible wall switch are in place.
![1]()
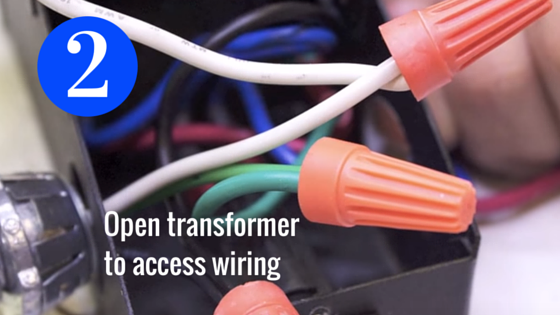
- Open the transformer case and remove knockout holes to gain access to internal wiring.
![2]()
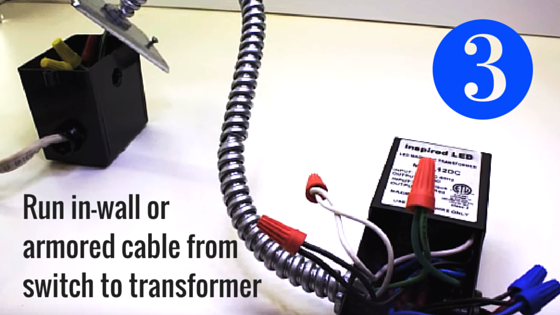
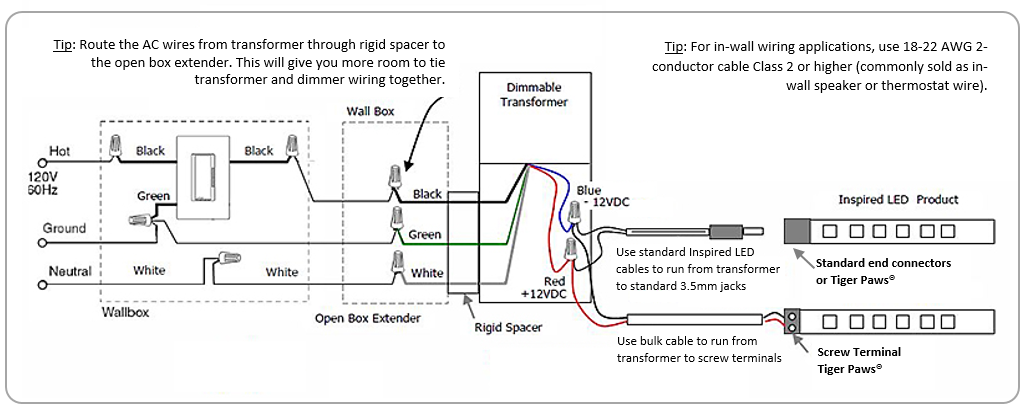
- Use in-wall rated or armored cable to run from the compatible wall switch to wall box, if this is where connections will be made, otherwise run directly from the switch to the location of the transformer.
![1]()
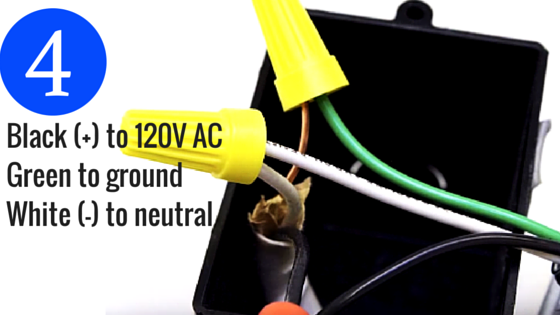
- Connect the cables from the switch to the transformer using wire nuts: black (+) connects to the live 120V AC, green connects to the ground wire, and white (-) connects to neutral.
![2]()
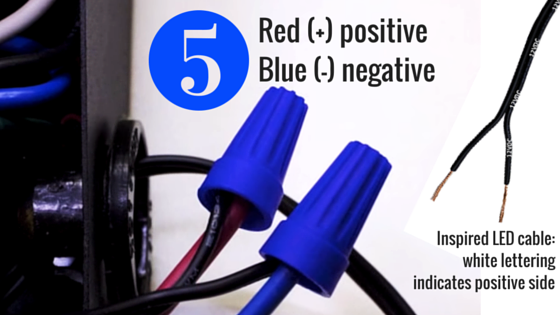
- Connect the transformer to the low-voltage LED wiring using wire nuts: red wire is positive (+), blue wire is negative (-). Note: If using Inspired LED cable, cut off one end connector, split and strip wire. The side of the cable marked with white lettering is positive (+) and should be connected to the red (+) wire.
![3]()
- Ensure that your LEDs are connected with standard 3.5mm jacks if using Inspired LED interconnect cable, or screw terminal connectors if using bulk cable.
![4]()
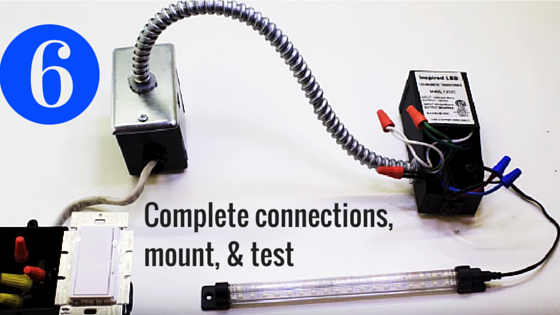
- Close up & mount your transformer in a well-ventilated area, turn on main power, and test the switch.
![Wiring Diagram]()
For more information on how to hardwire your dimmable transformer, download our printable tutorial, watch our instructional video, or read more on our website.
If you have additional questions about how to hardwire your LED system, or for help creating your custom layout, contact us at 480-941-4286, or send an email to orders@inspiredled.com.