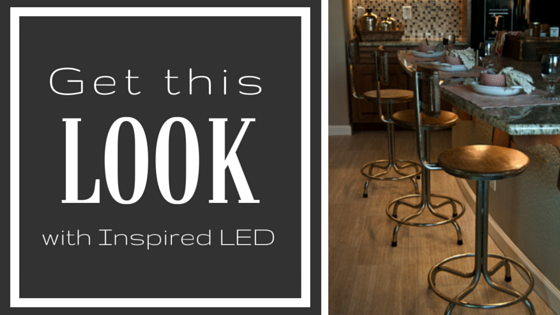
Welcome to week three of Get This Look with Inspired LED! Today we’ll be taking a look at how to enhance the design of home or commercial bars with the help of LED strip lighting…
Home bars and kitchen islands have become more and more common these days in both new homes and remodels. Whether it is the first place you stop when you get home from work, or the spot for serving up drinks at your next house party, these fun little spaces can be made even more inviting with a little LED lighting!
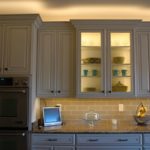
Bars and islands tend to be primarily illuminated by overhead fixtures such as pendants or can lights. While these may serve a functional purpose, there are other areas, such as under the counter, or along the toe kick, where LED strip lights can add an extra touch of style.
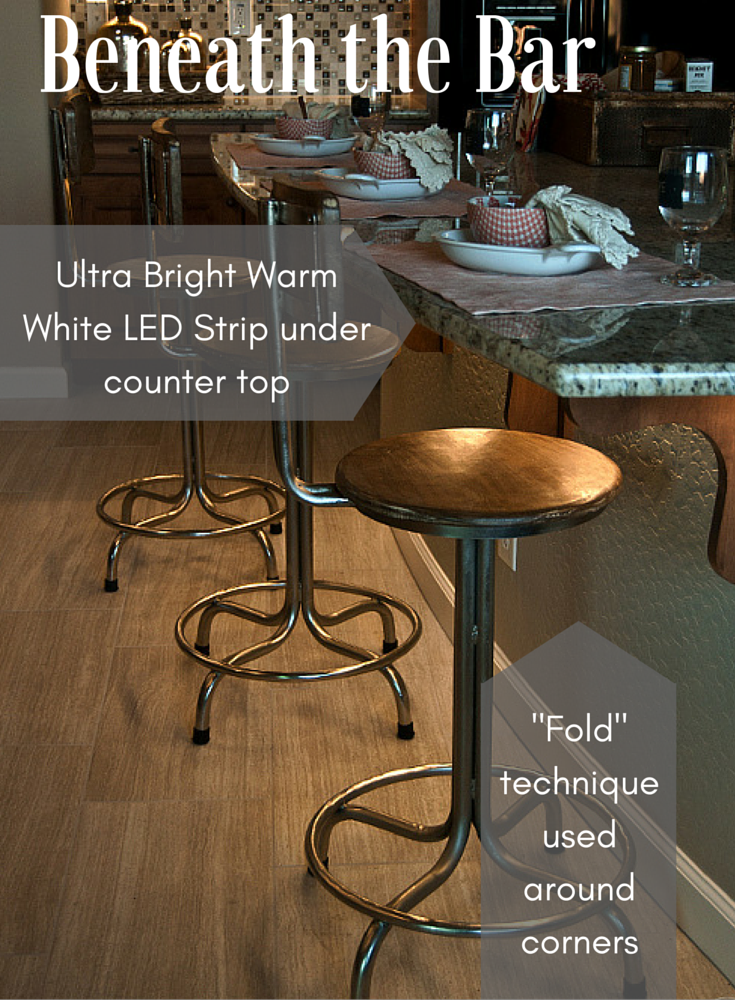 This is a relatively simple look to achieve using Inspired LED’s flexible LED strips, our patented Tiger Paw® connectors, a basic in-line switch, and a 12V DC power supply (for a ready-made kit option, check out our Cut & Connect series)! As always, our LEDs are available in a variety of different colors to match your décor. We typically recommend using either Normal Bright or Super Bright LEDs for this application to give the area a nice ambient glow without causing any overwhelming glare.
Begin by measuring out the “total available space” of the area you would like to light. This will determine the length of the LED strips you will need to cut. When working with counters or toe-kicks, you will likely need to maneuver around a corner or two. This can be accomplished using our approved How to… bend flex technique, or you can terminate your strip to a 4” jumper cable and begin lighting again once you’ve rounded the corner. For measurement purposes, if you chose to use the folded corner technique, be sure to give yourself an extra inch of length for each corner. You will also need to subtract an inch and a half for each connection point in order to leave room for cable to plug in.
So if, for example, you were lighting a three sided bar with measurements of 48”, corner, 24”, corner, and 48”, you would have a total available space of 120”. If you planned to use the folded corner technique, you would add one inch for each corner, adding up to a total of 122”. If you chose to work with a single strip, you would only need one connection point for your power supply to plug in, so you would subtract 1.5”, reducing your total strip length to 120.5”.
Once you have determined your measurements, you can begin to assemble your bar lighting system by cutting LED strips to the appropriate length. Add Tiger Paw® connectors to each connection point, and temporarily mounting the LED flex in the desired location using scotch or painter’s tape. This will allow you to test the brightness level and positioning prior to permanent installation. Make any necessary connections by plugging in jumper cables, and be sure to add a jumper cable to the beginning of your run if you plan to install an in-line switch. Lastly, plug in your power supply and test out your new system!
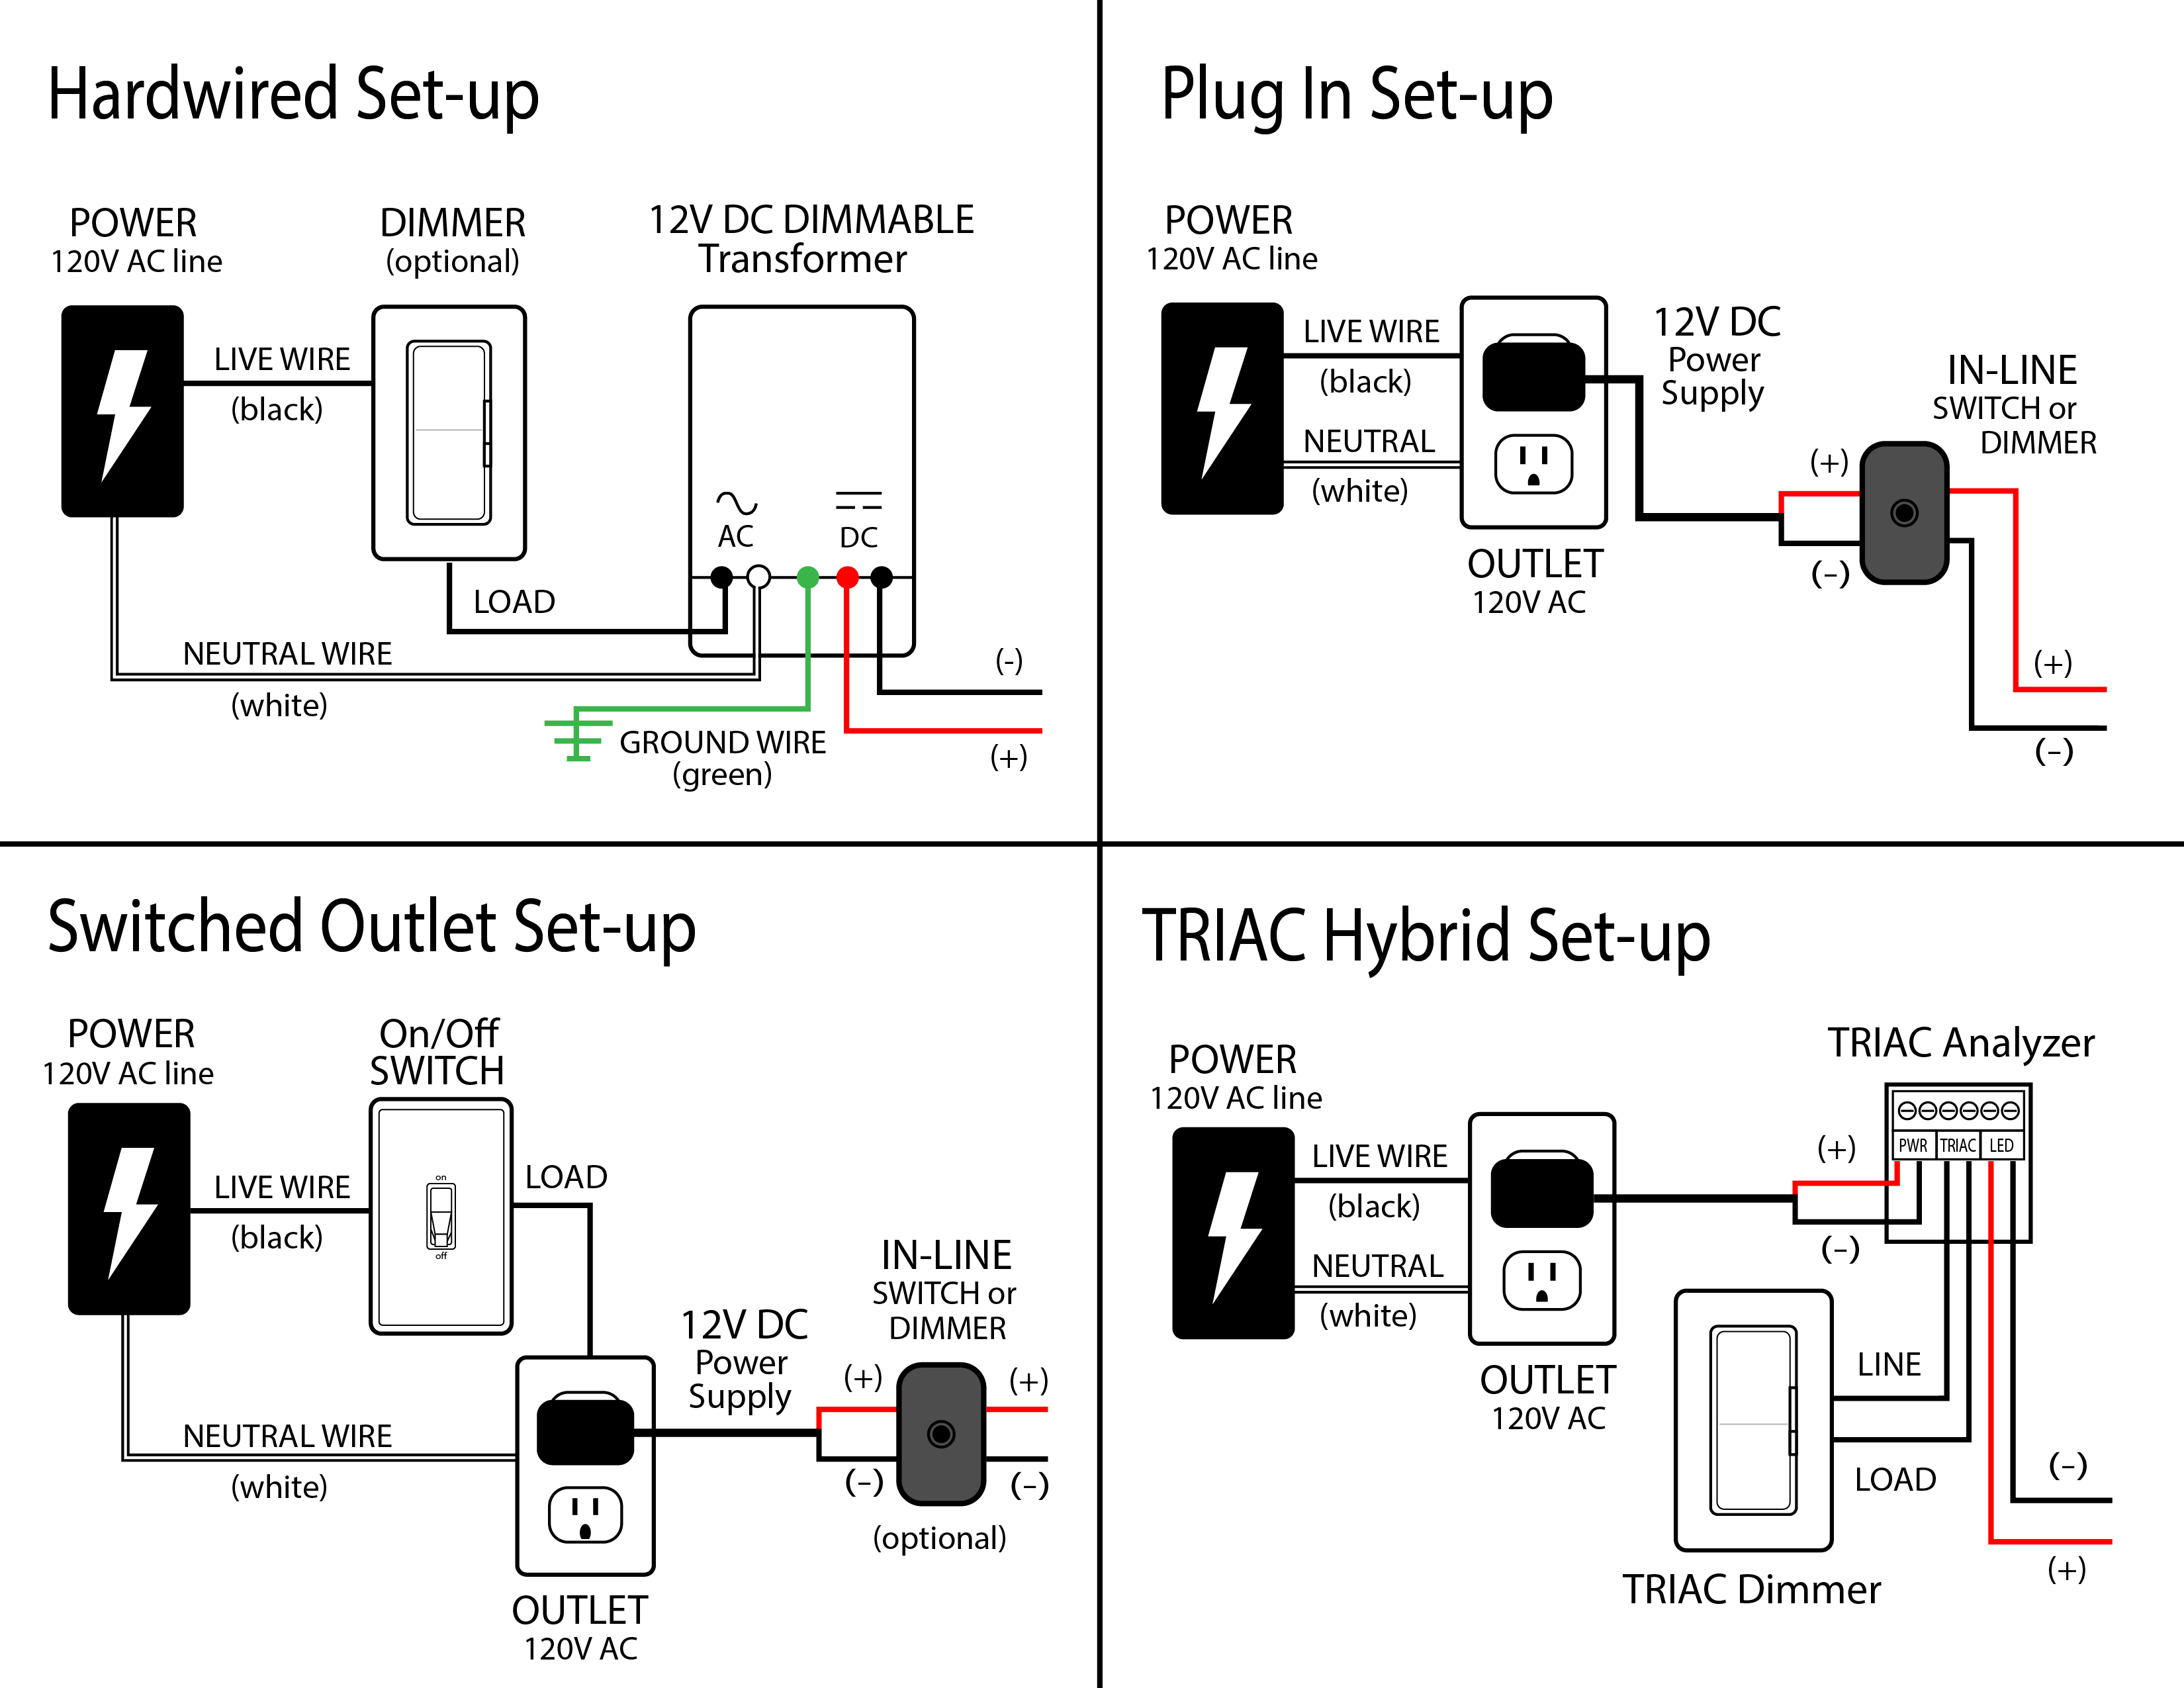
Please note, if you wish to hardwire your bar lighting, you will need to purchase a hardwire dimmable transformer in place of a plug-in power supply, and a compatible wall dimmer switch like the Lutron Diva in place of the in-line switch. After your lights are mounted with connectors, a licensed electrician to wire your existing 12o V AC wires to the wall switch, then to the transformer, and on to the lights. See the comparison chart below for more information about how to power your LED lights from beneath the bar:
Be sure to keep an eye on our blog for the next feature of Get This Look with Inspired LED, as well as other project tutorials, and company news. For assistance with your next lighting project, contact our customer service team at orders@inspiredled.com, or take advantage of our free Design Services for a free layout and quote!